How to Choose Small File When Upload
7 Ways to Reduce Image and Video File Sizes for the Web
Nosotros've posted before about how to optimise images and videos for the web.
Still, in this post, we will drill down into one surface area of optimisation with seven methods that you can use to reduce the file sizes of images and videos.
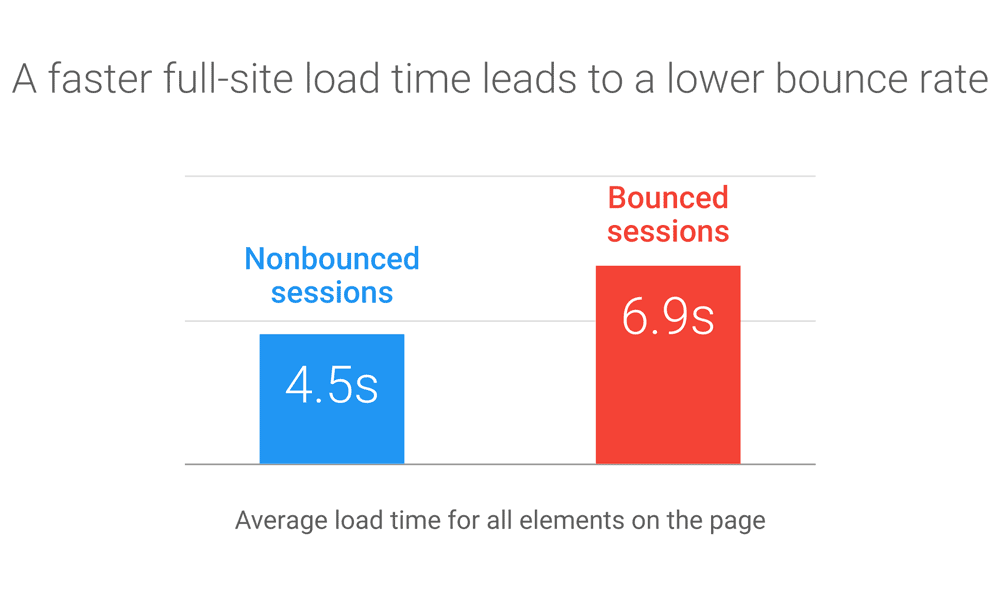
The main do good of smaller prototype sizes is that it makes web pages load faster.
The experts say that as the load time of a web page increases from 1 second to seven seconds, the probability of a mobile visitor bouncing (leaving again right abroad) increases 113% [source: Think With Google].
The BBC found they lost an additional 10% of users for every extra second their site took to load [source: Creative Bloq].
As well as a slow loading website existence a bore for your visitors, search engines now consider the speed of a website when deciding how to rank spider web pages in search results, so slow websites can detect themselves held back and their traffic curtailed.
Images and videos are commonly the largest files on a spider web page, so making them smaller is often the quickest way to speed upwards a website.
The practiced news is that if you know how to do it right, this tin exist done without sacrificing much noticeable epitome quality.
All these methods will piece of work for both prototype and video files except the CSS filter method.
I've started by scaling each image in this post to 1200px × 800px, saving them with Photoshop's "save for spider web" compression to allow a off-white before and after comparison.
These 3 methods are the most basic and well-known ways to reduce the file size of images and videos:
1. Pick a sensible resolution

It'southward best practice to scale images and videos to no larger than the size they'll end upward being displayed at.
There'southward no point getting a browser to download a 2mb image that'due south 2000px × 1000px only for the browser to calibration it downward to 400px × 200px.
You lot may as well serve the epitome at the resolution information technology volition finish up being displayed at right from the starting time.
As for images and videos that you intend to fill much of the browser window, similar header videos or slider background images, I notice a maximum width of 1200px – 1500px is commonly adequate, then long as they don't contain lots of fine detail.
Larger images can generally be safely scaled up a little for big screens without it being too noticeable.
2. Pick a suitable file format
Pictures and videos should be saved in a sensible file format. Some rules of thumb:
● Photos should exist saved as JPG
● Logos and other line-based details are ideally served in SVG, or every bit PNG for applications where SVG doesn't work correctly. At the time of writing, yous'll need to utilise a plugin like Safe SVG to upload SVGs to a WordPress website.
● Suitable file formats for video on the spider web are MP4, WebM, WebVTT or OGV (though OGV is incompatible with Internet Explorer and Safari).
After uploading images in 1 of those formats, you can evangelize them in the modern WebP format to browsers that support it (not all do still) using a plugin.
The WebP file format was developed by Google and provides superior image compression without much of a loss of quality.
Net Explorer and Safari aren't able to display WebP images even so, so you should upload images using the file formats listed to a higher place and rely on a plugin to show WebP versions only to browsers that support it.
Websites running on LiteSpeed can make use of the native WebP compression congenital into the complimentary LiteSpeed Cache plugin.
By the way, I'd recommend hosting merely small-scale video files with your website and serving more extensive videos to visitors using a service like Vimeo, YouTube, Metacafe, Dailymotion, Veoh or like.
three. Shrink before uploading

It's crucial to compress images and videos before uploading.
Pinch codecs use many techniques to cut down the data needed to describe an epitome or the frames of a video, and they trim out unnecessary data that won't exist seen in the final file anyway.
For image compression, Photoshop has an excellent feature for this chosen 'salve to web'.
This allows you to set the required file format, image resolution and the level of compression.
More compression means a smaller file size, but a lower quality prototype – loftier quality (60%) is usually the sugariness spot.
If you can't e'er command the compression of images before they're uploaded (for example you lot often publish posts from your phone, or you let website users to upload pictures), you can use an prototype compression plugin like Shortpixel or Smush that volition shrink images automatically later they've been uploaded.
Compressing video isn't as simple equally information technology is with images as there'due south a corking slew of codecs and file formats bachelor.
Additionally, video pinch takes into consideration how much detail changes between frames and uses keyframes to store image data to be reused in other frames.
2 of the well-nigh pop gratis applications for video compression are Freemake (easy to utilise) and Handbrake (providing more configuration options).
Nevertheless, if you've edited a video, it's best to set the correct compression settings when yous export information technology rather than passing it through additional pinch software as each pass will needlessly reduce the epitome quality a piffling more.
At present, some of the lesser-known methods for reducing image and video file sizes:
4. Option images and videos with less particular
I of the all-time ways to make sure all your images and videos have a small file size is to selection more straightforward pictures right from the outset.
The detail is what gives images their file size, so if you lot choose models with smaller areas filed with fine item, those images will have smaller file sizes.
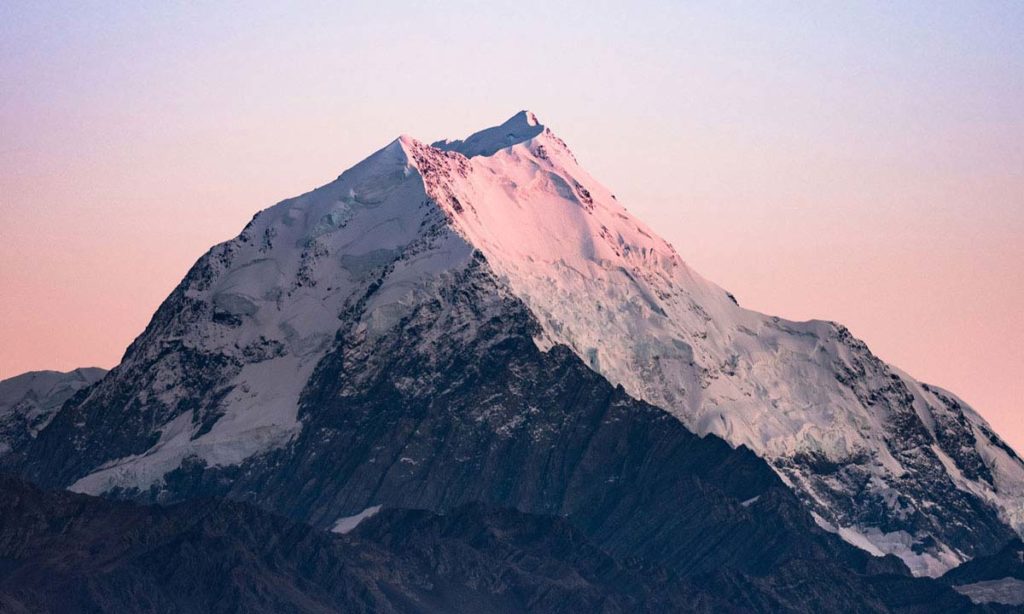
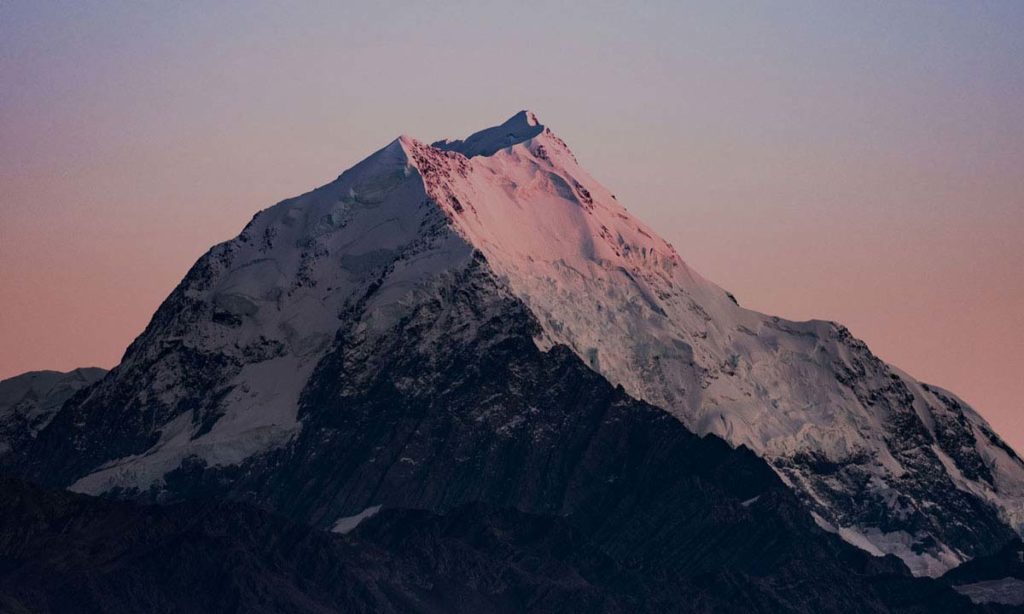
Guess which of these ii images has a larger file size?
-
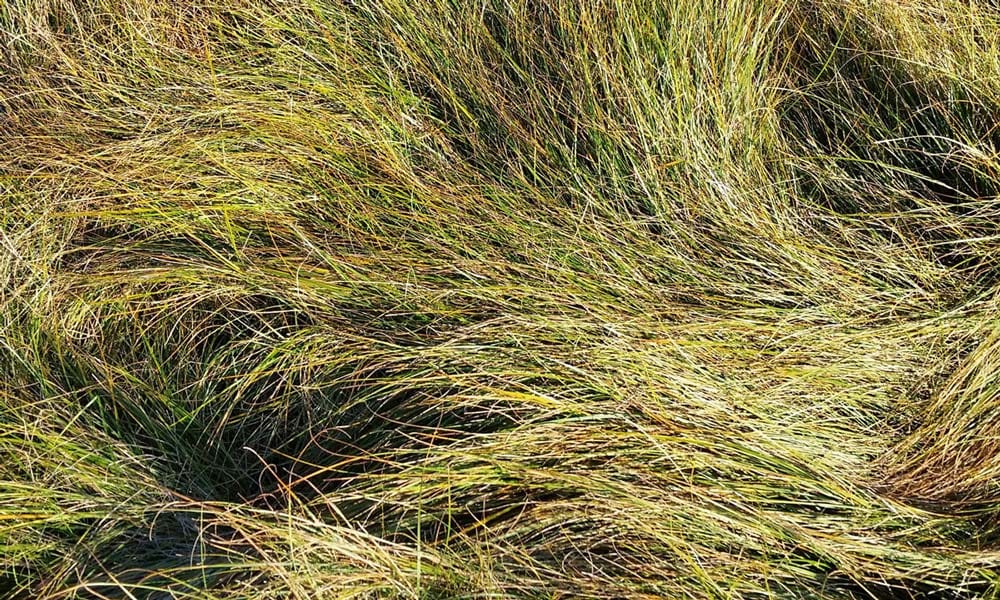
605kb -
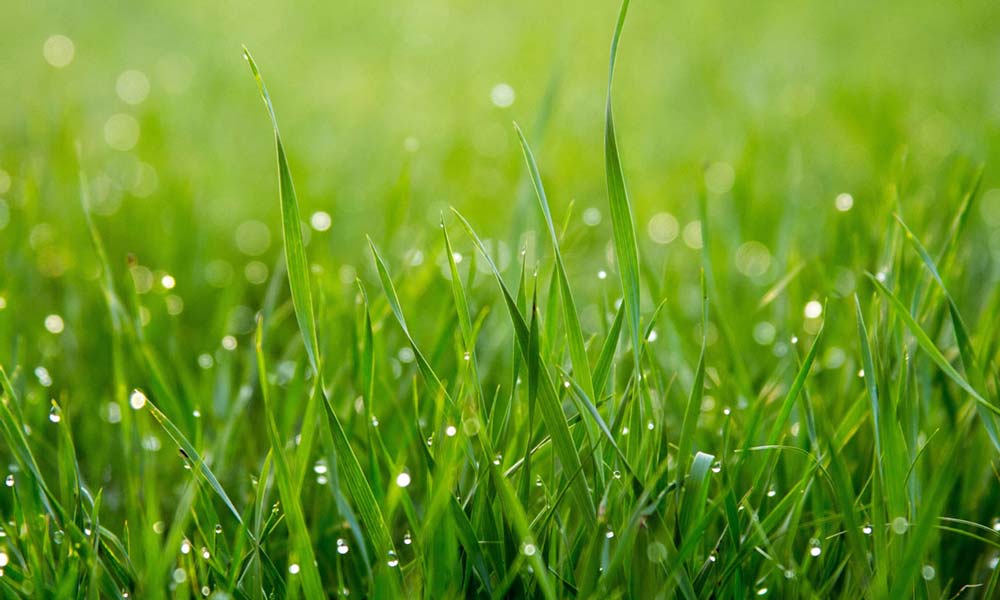
178kb
This works for both images and videos, as Tim Scott explains here:
So a video groundwork that uses blurred city lights, for case, will be a much smaller file than a timelapse video of the night sky, even if both videos have the same resolution, elapsing and pinch bitrate.
v. Denoise or add blur
Images or videos taken in dark weather with a camera using a high ISO can be very grainy, and this can ramp up file sizes dramatically.
Denoising images and videos that comprise a lot of grain or dissonance in an awarding like Photoshop, GIMP or Premiere Pro can help.
Alternatively, calculation fifty-fifty but a trivial gaussian mistiness across a whole paradigm or video can drastically reduce its file size.
Or for a more subtle effect if function of the image already features natural lens blur, accentuate it a picayune.
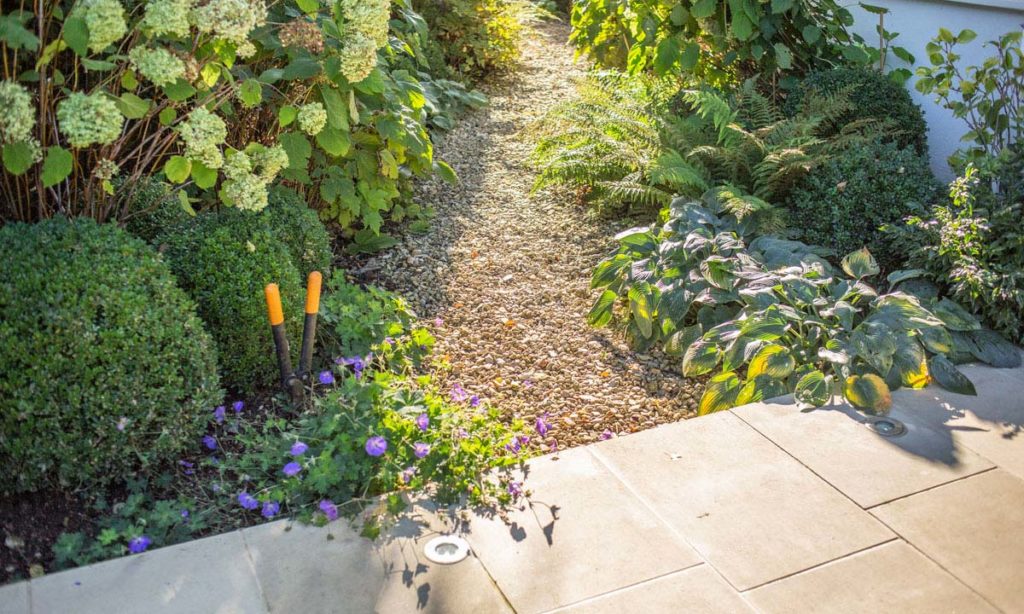
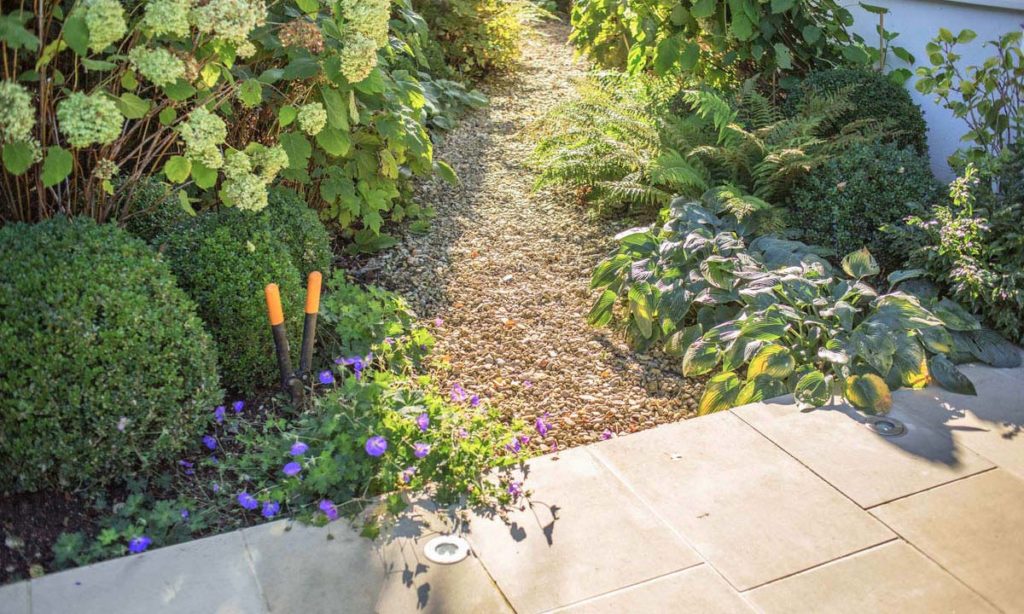
In this image, I've added extra tilt-shift mistiness to the foreground and background.
Original on the left: 207kb and blurred on the right: 153kb, a 26% reduction.
-

Original – 207kb -

Blurred – 153kb
6. Add color or turn downwards the lights
Reducing the dynamic range of an prototype by concealment it can help too.
In the flick below, I've darkened the lightest areas in Photoshop.
-
156kb -
121kb
Original on the left: 156kb and darkened on the correct: 121kb, a 22% reduction.
Adding a colour wash over an image would be another way to reduce file size.
You could utilise your make colour to brand it tie in with your website's design at the same time.
From a visibility standpoint adding blur or darkening an epitome can be an first-class thought for images used equally background images equally it stops the detail in the background image from ambivalent with whatever is overlaid, whether that's text or icons.
seven. Re-add saturation and dissimilarity with CSS filters
OK, this one is going to be a piddling more than "out there", and this method is only possible with images, non videos.
Every browser apart from IE and Opera Mini (which business relationship for 1.7% – 2.two% of internet traffic depending on whom you ask) can work with CSS filters.
Filters instruct the browser to adjust the saturation, dissimilarity, blur, hue etc. of an image.
This allows us to reduce the saturation and contrast of an image, reducing the data it contains, and therefore its file size, earlier boosting the saturation and dissimilarity again for website visitors using CSS.
One issue – without getting too technical, due to the weirdnesses of colour, not every colour is resaturated to the same level, so extreme saturation readjustments can mess with the colour tones of an epitome.
Therefore I advise confronting cutting out more than than 50% of the saturation in step 1.
Here's how it's done:
- Get-go, reduce the saturation and contrast of an image offline. Merely similar with all compression, the more you reduce, the lower the file size and quality will be. If you use Photoshop for the dissimilarity adjustment, you'll want to tick "utilise legacy" to make it act the aforementioned as the CSS filters you'll use later on to reverse the result.
- Upload the epitome to your website.
- And then apply this CSS to the image:
- filter: saturate(x) dissimilarity(10);
Gear up the x saturation and contrast values to whatever multiple is needed to boost them back up to 100% of the image'due south original values.
I detect saturation values need to be additional a little actress to brand up for the additional color loss wrought past the drop in contrast.
So for instance, I cut the saturation and contrast of the image beneath to 30% of their original values, and so boosted its saturation once again in CSS by a value of 1.half-dozen and dissimilarity by 1.4.
-
365kb -
280kb
Original on the left: 376kb and filtered on the right: 280kb, a 26% reduction.
Hither'due south how it looks in Chrome, Firefox and Edge:
Advantages of this method:
● Faster page load times, of course. Combined with other reduction methods, this could add up to something meaning.
● The original hosted images are permanently changed, which could be used as a less visually invasive alternative to watermarking images to protect them from being copied.
Disadvantages of this method:
● Extreme color shifts may be a trouble for colour sensitive images like portraits, so care for the saturation gently
● If yous want users to be able to download the image or for information technology to appear in Google Images search results just as it does on the page, they'll become the desaturated version.
Like with all forms of epitome compression, this method has its limits every bit the more data yous remove from an prototype, the harder it is for it to meet a reasonable standard of quality.
Writer Bio: Aidan Ashby is a spider web designer, developer and branding designer who lives in Northampton, UK, with Lucid Rhino Web Design. You can follow him on Twitter @LucidRhinoWeb, on Instagram at @LucidRhinoWeb, or you can reach him at aidanashby@lucidrhino.design.
Source: https://inkbotdesign.com/reduce-images-and-videos-file-sizes/
Post a Comment for "How to Choose Small File When Upload"